


OK... This one is the last one.... it's about how to set up NetCA for Connection.
1. Click on Run from Startmenu, type "cmd", and then OK. This will trigger command prompt, in command prompt, type "netca", then press return/enter.
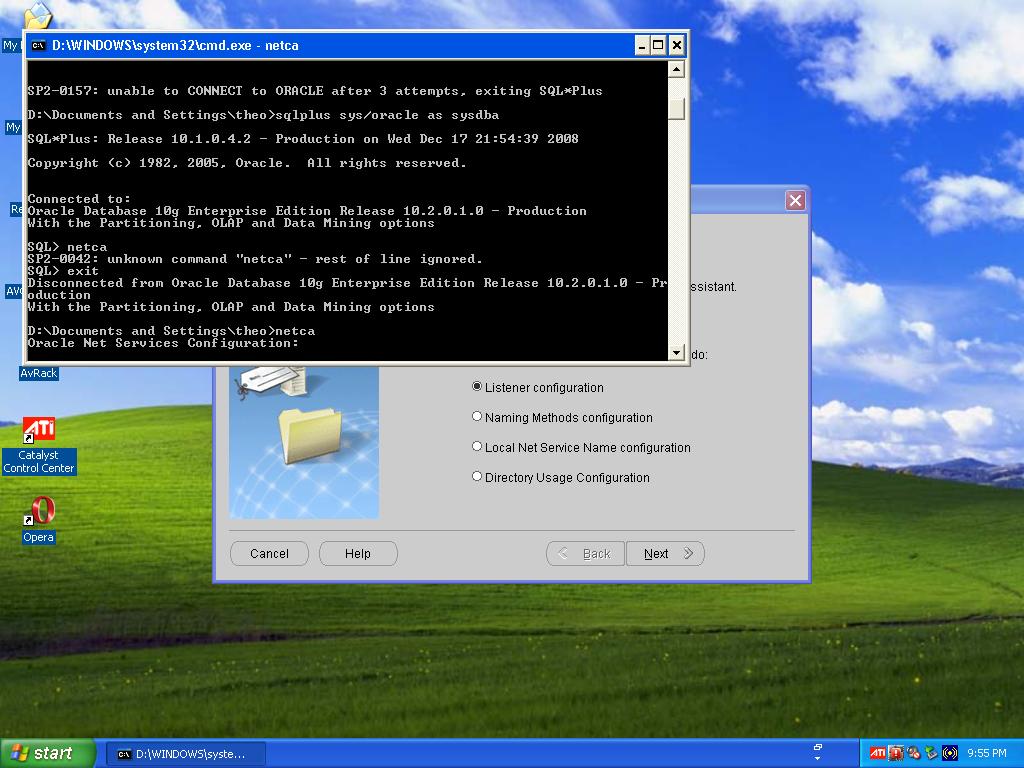
2. This screen will be appear. Choose "Local Net Service Name Configuration", and then Next to proceed.

3. Choose Add, and then Next...

4. Fill in the Service name with the available service. Mine is "orcl" (See the picture on step 2 of Installing Oracle Database, there's a global database name) and then Next.

5. Choose TCP, and then Next

6. Enter hostname which is used by your oracle (for example from my EM address is http://118.136.32.239:1158/em , so I should fill it with "118.136.32.239"), for ports, you can use standard ports or other ports available. I'm using standard ports, so I choose "Use Standard Port Number of 1521".
Then Click Next to proceed.

7. Choose "Yes, perform a test" and then click next.

8. If the screen shows "The Test did not succeed", click on "Change Login".

9. Fill username with unlocked user id, and the password that you've set it before. For example, I use user "scott". Click OK.

10. Keep trying until the screen shows that the test successful. If it's successful, then click on Next to proceed.

11. Fill in the net service name for the connection. Click Next...

12. If you want to configure another net service, then choose Yes, if you're done, choose No. Click on Next to finish.

That's all for the installation process I've been going through. :)
Hope this tutorial can be some help for you. :)
No comments:
Post a Comment